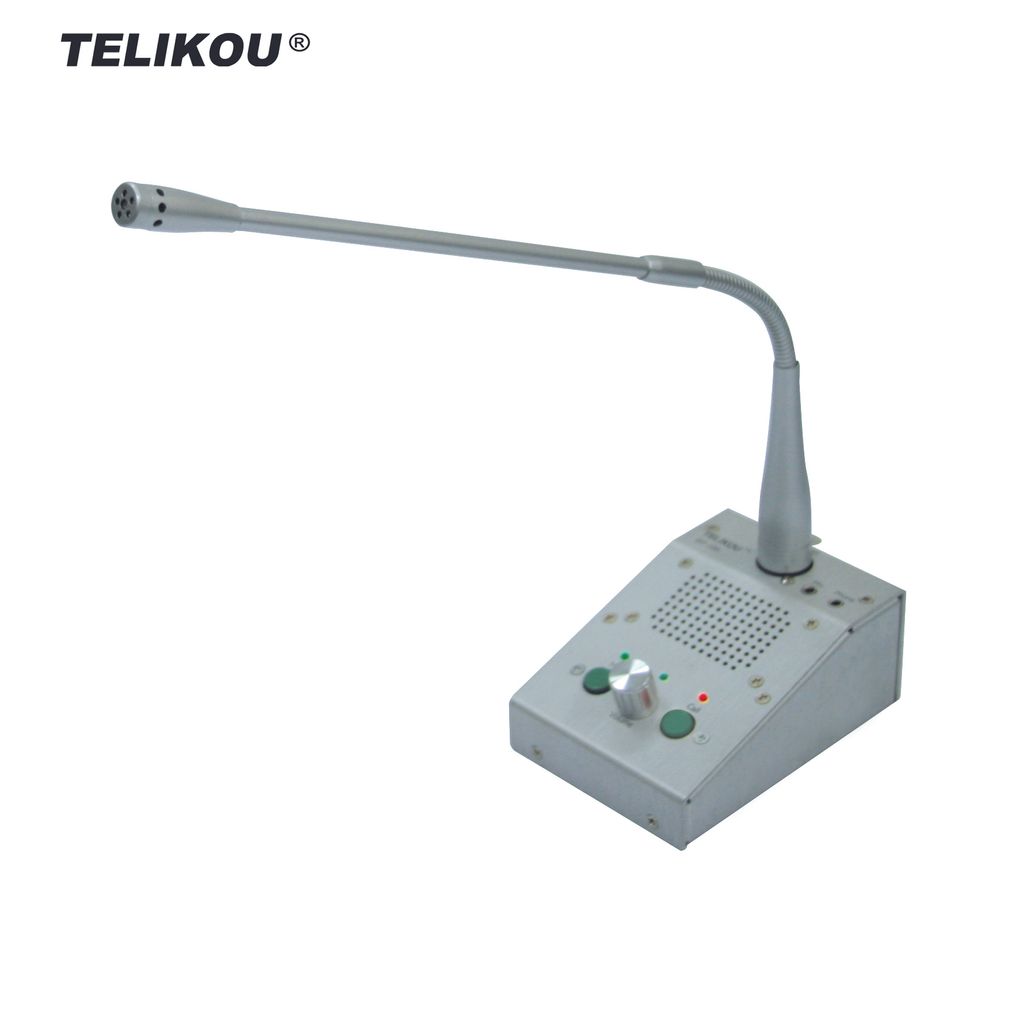
Telikou DT-100 desktop station
Includes GEM-16 Gooseneck microphone, Panel speaker
Call button, Microphone button, 3.5mm jace earphone and microphone connector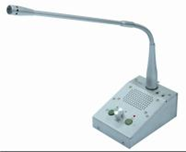
- Introduction
Thank you for choosing TELIKOU intercom product. DT-100 desktop station can work with any TELIKOU Intercom standard main station, and it is suitable for TV station, communication command center, outside broadcast van, show, project test field, and other applications where communication is required.
This system adopts wired connection, and has following features, free of external emission interference, stable and reliable performance, flexible configuration, full-duplex communication, clear and loud communication sound, easy operation, and strong noise resistance.
- Quick start
1. Use appropriate 3-pin XLR line cable connecting station to an intercom main station. If station is receiving DC power, the Power LED will light up.
2. Turn volume control knob to the end anticlockwise, and plug in the microphone or headset.
3. Press Mic button and the green indicator above button will be ON, which indicating that the microphone is turned on.
4. Adjust the sidetone control (use a small screwdriver and insert it into the hole at bottom) and volume level, and ensure that the sound level for your own voice from the earphone is adjusted to minimum.
5. Press the Call button to send a talk request.
6. After the completion of talk, press the Mic button again, the indicator will be Off, and the microphone will be turned off.
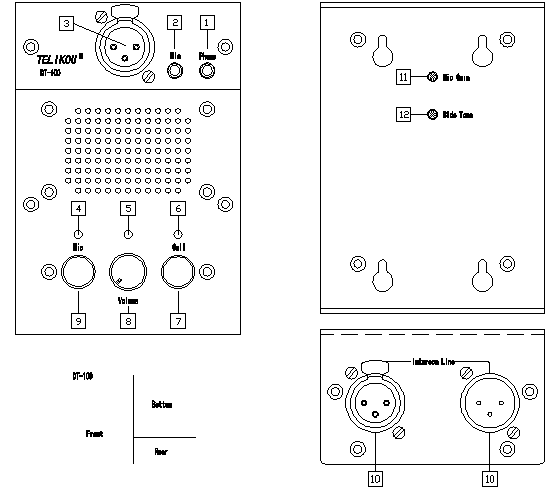
l Basic operation
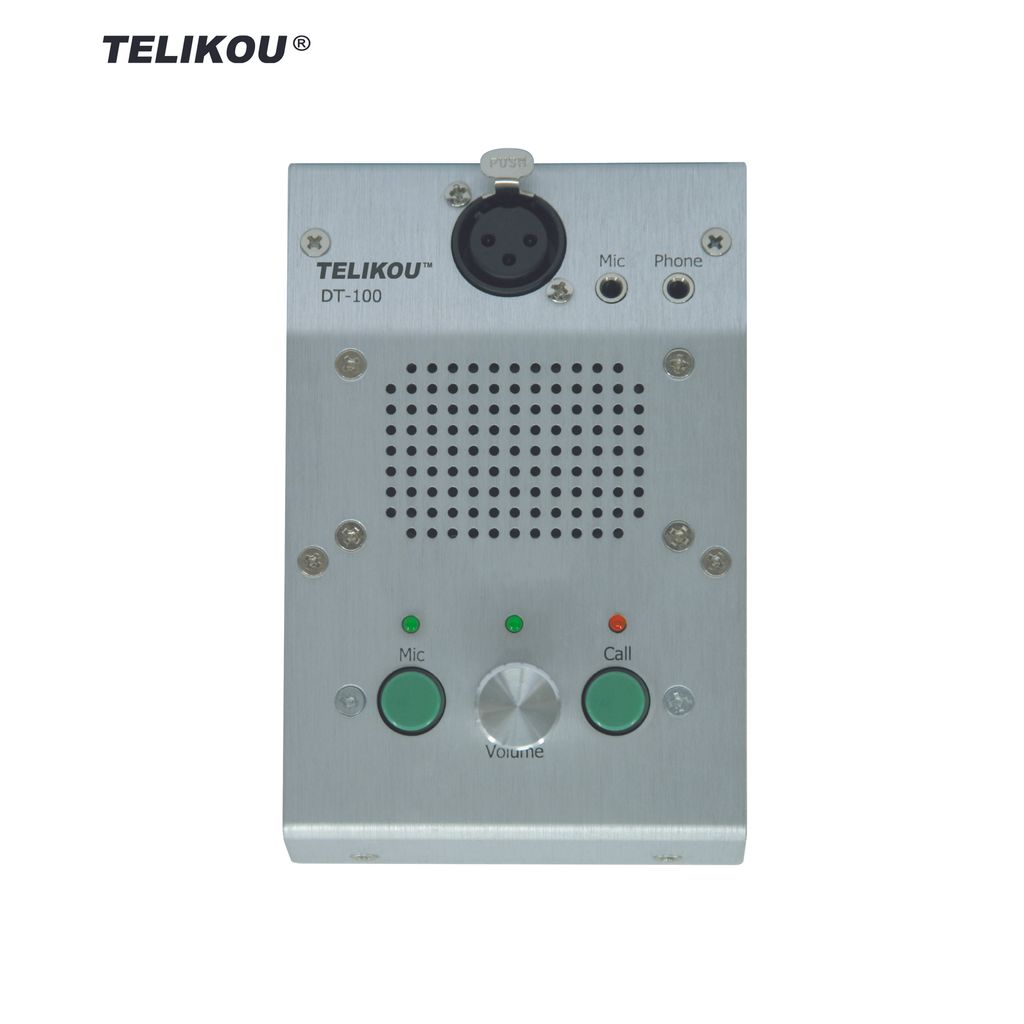
Upper Panel
1. Phone Jack
3.5mm earphone jack
2. Microphone Jack
3.5mm microphone jacl
3. Gooseneck Microphone Connector
3-pin XLR female connector. Configuration pin outs:
Pin 1 -- Mic common
Pin 2 -- Mic hot
Pin 3 -- Null
4. Mic LED
A green LED indicator. When Mic switch is turned on, this light will be ON.
5. Power LED
A green LED indicator. When DT-100 is powered on, this light will be ON.
6. Call LED
A red LED indicator. When a call signal from the intercom system is received, this light will be ON, indicating that there has a talk request of some station.
7. Call Button
Pressing down this button will send a call signal to the intercom system, and the LED indicator above it will be ON to indicate that the call function is activated.
8. Volume Control
This knob is used to control the level of audio signal received from the intercom line, and can be used to adjust the volume of internal speaker and earphone.
9. Talk Button
The talk button turns the microphone circuit on and off. Press button, the Mic LED will light, that indicate the microphone is turned on, and the sound from the microphone will be sent into the intercom line. This button controls an internal flip circuit. When it is pressed once, the circuit will be turned on, and the Mic LED indicator will be ON; when it is pressed again, the circuit will be turned off, and the Mic LED will be OFF. When the connection between DT-100 and any TELIKOU Intercom main station is established, the Remote-Mic-Kill button of the main station can turn off the microphone of the DT-100 remotely.
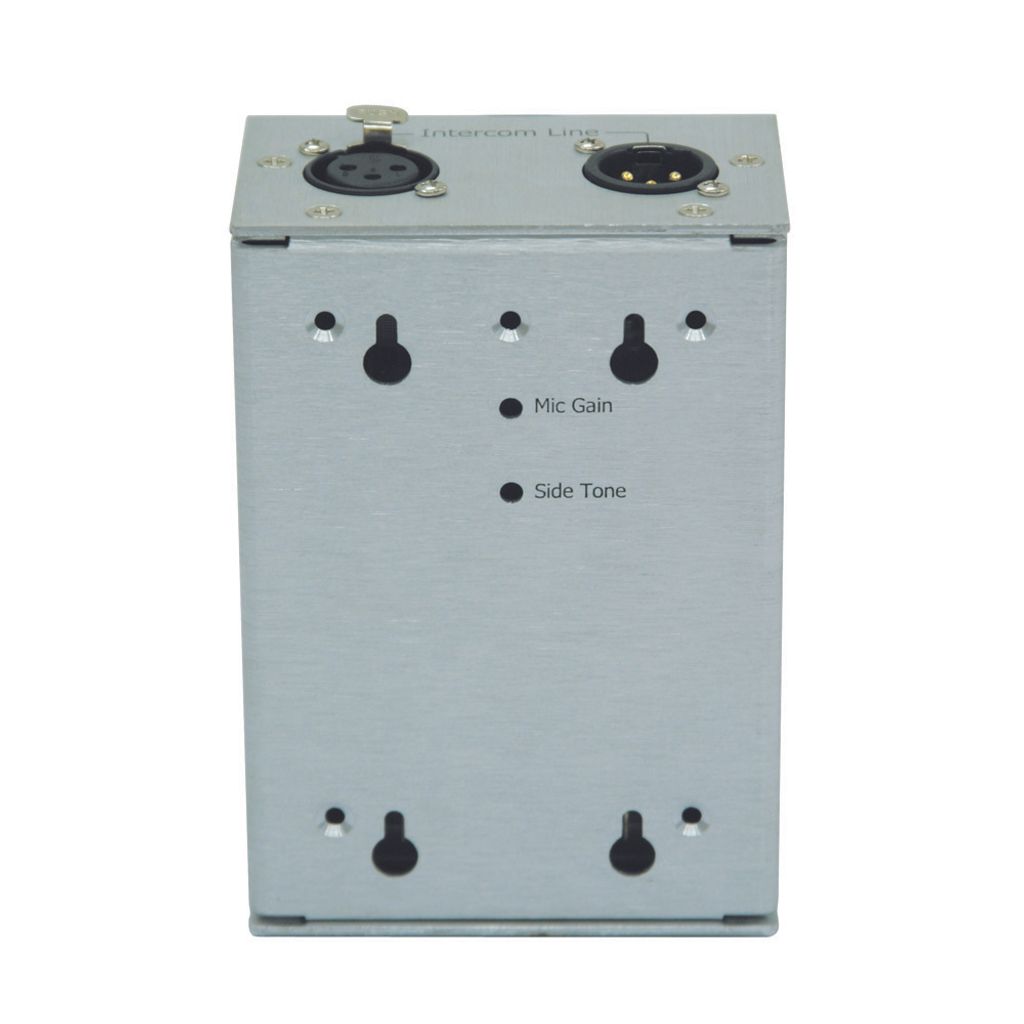
Bottom Panel
10. Intercom Line
A pair of 3-pin XLR male and female connectors parallel connected at internal for loop through connection of the intercom station.
XLR-3 configuration pin outs:
Pin 1--Common
Pin 2--DC supply(12-30V)
Pin 3--Audio signal
11. Mic Gain
It is used to increase or decrease the gain for panel microphone to achieve proper microphone output level. It has no effect on the sensitivity of the headset microphone. The microphone is set according to the Electret type before delivery. If the type of panel microphone is changed, re-adjustment is required.
12. Sidetone Controls
It is in the hole at the bottom of the unit, and can be used to adjust the sound level of your own voice that you can hear while you are talking, aiming to decrease sound feedback and avoid squeal. When making adjustment, turn on the Mic key and adjust volume to proper level, then make a sound against microphone, or make a sound via rubbing microphone with finger. At the same time, use a small screwdriver rotate the knob at clockwise and anticlockwise slowly, until the sound or rubbing sound is minimal.
l Troubleshooting
Problem: Listen level too high or too low
Cause 1: More than one Terminal in the system or non Terminal
Solution 1: Check every channel, each channel must only have one Termianal.
Problem: Microphone level too high or too low
Cause 1: Mouth is far or close to the mouth
Solution 1: Adjust the distance between microphone and mouth
Problem: System feedback (Acoustical)
Cause 1: Listen level control at this station or a remote station is set too high
Solution 1: Adjust
Cause 2: Sidetone null control at this station or a remote station is not adjusted correctly
Solution 2: Adjust. Refer to the procedure in the Front Panel section of this manual.
Cause 3: Channel un-terminated.
Solution 3: Set the MS-800 termination switch to the ON position.
Cause 3: A headset cord is too long or jointing quality.
Solution 3: Check headset cord
Problem: Can not turn on the Mic function
Cause 1: The connection among TELIKOU main stations must go via Online connector on rear panel. The Online connector of this station connected to the Intercom Line connector of another station.
Solution 1: Check the connection of Online connector
l Specifications
1. Pre- Amplifier (From Microphone to Line)
Dynamic Headset Mic impedance: 200 ohm
Voltage Gain: 49±3dB
Bandwidth: 40Hz-8000Hz ±2dB
2. Headphone Amplifier(From Line to Load)
Load impedance: 50-600 ohm
Voltage Gain: 31±3dB
Harmonic Distortion: <0.1%(1000Hz)
Bandwidth: 200Hz-8000Hz ±2dB
3. Others
SNR: >72dB
Current: <120mA
Power Range: 12-30V DC
Environment: -10~55°C
Dimension: 105mm x 87mm x 48mm
4. Compatibility
DT-100 desktop station is compatible with TELEX and Clear-Com Party-Line intercoms.

